Your Guide to Private Email Server Setup

Setting up your own private email server means you're taking back the keys to your digital kingdom. You install and manage the email software on a server you control, giving you complete ownership over your data and communications. It's a powerful move away from big tech's data mining and ad-driven models, creating a truly private channel for your messages.
Why Run Your Own Email Server?
Let's be clear: deciding to run your own email server is a big leap. You're shifting from being a simple user to the owner of the entire service. For most people who go down this path, the driving force is a desire for genuine digital sovereignty.
Think about it. When you use a free email provider, your data isn't really yours. It's a product, often scanned and analyzed to build a detailed advertising profile. Hosting your own server flips that script completely. Your emails are no longer routed through third-party systems where they can be read, monetized, or even blocked without your say-so.
For businesses, this level of control is more than just a preference—it’s a necessity. If you handle sensitive client information, you're likely bound by compliance standards like GDPR or HIPAA. In that world, protecting data isn't optional, it's the law.
Gaining True Data Control and Privacy
The real payoff of a private email server is absolute control. You set the rules. You decide on storage limits, security protocols, and who gets an account. There's no risk of a provider suddenly changing its privacy policy, killing a feature you depend on, or locking you out of your account with little explanation.
This independence also puts you in a stronger security position. While massive email providers are a huge, tempting target for widespread data breaches, a small private server is a much less attractive target. You're in charge of your own defenses, which means you can build security that fits your specific needs instead of relying on a generic, one-size-fits-all solution.
By hosting your own email, you're not just creating an inbox; you're building a digital fortress. Every policy, from user creation to encryption standards, is your decision, ensuring your communications align perfectly with your privacy and operational needs.
Comparing Your Email Hosting Options
Before you jump in, it’s smart to understand the trade-offs. Public cloud email is convenient, no doubt, but that convenience comes at the cost of your privacy and autonomy. A private server offers maximum control, but that control comes with the responsibility of managing it all yourself.
Here’s a quick comparison to lay it all out:
Public Cloud Email vs Private Email Server
| Feature | Public Cloud Email (e.g., Gmail, Outlook) | Private Email Server |
|---|---|---|
| Data Privacy | Data is often scanned for advertising and analytics. | You own and control all data; no third-party scanning. |
| Control | Limited by the provider's terms of service and features. | Full control over software, security, and user policies. |
| Customization | Restricted to available settings and integrations. | Nearly unlimited customization of domains and features. |
| Cost | "Free" tier is ad-supported; paid tiers per user. | Fixed infrastructure cost (VPS/server), not per user. |
| Maintenance | Handled entirely by the provider. | Your responsibility (updates, security, backups). |
This table makes the choice pretty clear: it's a direct trade between convenience and control.
And this isn't just a niche idea. The market shows a clear trend toward self-hosted solutions. The global email application market is on track to grow from USD 1.6 billion in 2025 to USD 4.7 billion by 2035. This surge is largely driven by businesses looking to escape the privacy concerns tied to major cloud providers. You can read the full research about this on-premises email market growth to see how the landscape is shifting.
Ultimately, choosing to set up a private email server is a deliberate move to own your digital identity. It's about ensuring your communications stay confidential, secure, and entirely yours.
Building a Solid Foundation for Your Server
Before you even think about installing email software, we need to get the groundwork right. A successful private email server isn't just about clever configurations; it's built on the right infrastructure. Think of it like laying the foundation for a house—if it's weak, everything you build on top of it is going to be unstable.
Your first big decision is choosing a Virtual Private Server (VPS). This machine is the digital home for your entire email operation, so picking the right one is non-negotiable. Don't just grab the cheapest option you find. Reliability is what you're after, and those rock-bottom prices often mean you're sacrificing performance or dealing with frustrating downtime.
Remember, a private email server is a critical piece of your communication puzzle. If it goes down, everything stops. That’s why you should only look at VPS providers guaranteeing at least 99.9% uptime. This is the professional standard and means you’re looking at less than 45 minutes of potential downtime a month.
Choosing the Right VPS Provider
I learned the hard way with my first server that not all VPS plans are created equal. The two most important things to check under the hood are the virtualization technology and the storage type.
- Prioritize Full Virtualization: Go for providers that use KVM (Kernel-based Virtual Machine) or something similar. This is what's known as "full virtualization," and it means your server resources—CPU and RAM—are truly yours. You're not sharing them, which is a common problem with cheaper, container-based options like OpenVZ where providers often oversell their hardware.
- Insist on NVMe SSD Storage: The speed of your storage directly impacts how fast your email feels. NVMe SSDs are the gold standard here. They blow traditional SSDs and ancient HDDs out of the water, making everything from fetching messages to sending mail feel incredibly responsive. You'll notice the difference immediately.
Don't forget about physical location, either. Picking a server geographically close to you and your users cuts down on latency. An email sent from a server in Frankfurt will feel much faster for someone in Europe than one hosted in Los Angeles. It's a small detail that makes a big difference in user experience.
It's no surprise that the demand for quality hosting is exploding. The global Virtual Private Server market was valued at around USD 5.1 billion in 2024 and is projected to hit USD 14.1 billion by 2033. This growth is driven by the very technologies making private servers more powerful and accessible. You can dig into more details about the booming VPS market and its technology.
Why a Dedicated Domain is Essential
Once you've got your VPS sorted, the next piece of the puzzle is your domain name. It might be tempting to use a free subdomain, but for a professional and trustworthy email identity, a custom domain (yourname.com or yourbusiness.com) is a must-have.
This dedicated domain becomes the core of your email address (like contact@yourdomain.com), instantly establishing credibility. More importantly, it gives you total control over the DNS records. This isn't just a "nice-to-have"; it's a technical requirement for authenticating your mail and keeping it out of spam folders.
With your own domain, you can create all the addresses and aliases you need to stay organized. For example, you could have billing@yourbusiness.com and support@yourbusiness.com to keep different communications separate. Thinking about the best methods for organizing email from the start will help you make the most of this flexibility.
Putting these two pieces together—a high-quality VPS and a dedicated domain—creates the solid, reliable foundation your private email server needs. Trust me, skimping on either will just lead to headaches down the road. Invest in the right infrastructure from day one, and you'll have a stable, secure email system you can count on for years.
Choosing the Right Email Server Software
Okay, you’ve got your server humming along. Now for the most important decision you'll make in this whole process: choosing the software stack that will actually run your email. This choice will shape everything from the initial setup to your daily management routine.
You're basically at a fork in the road. One path leads to a streamlined, all-in-one suite that gets you up and running fast. The other is a more hands-on, modular route where you piece together the components yourself. There's no wrong answer here—it all boils down to your technical comfort level, how much time you're willing to invest, and what you want to achieve in the long run.
The All-in-One Solution: Mail-in-a-Box
If you want a private email server without the headache, an all-in-one solution like Mail-in-a-Box is your best bet. Think of it as a complete "email server in a box" kit. It bundles all the critical software—like Postfix for sending mail and Dovecot for handling mailboxes—into a single, automated script.
This approach is a game-changer because it drastically lowers the technical barrier to entry. You don’t need to be a Linux guru or spend weeks deciphering email protocol documentation. The installer does the heavy lifting, configuring everything from your webmail client and spam filtering to the SSL/TLS certificates that keep your connections secure.
Imagine you're a small business owner who just needs a professional email address on your own domain. You don't have a dedicated IT team or the time for a massive project. With Mail-in-a-Box, you can have a secure, fully operational server running in less than an hour. It's the perfect way to reclaim your data privacy without getting bogged down in technical minutiae.
I often recommend Mail-in-a-Box to people who are new to self-hosting. Its real strength is its "it just works" philosophy. It makes a complex, multi-day project accessible to almost anyone.
The trade-off for this simplicity is a lack of flexibility. Mail-in-a-Box is deliberately opinionated; it's designed to work one way and one way only. If you get the itch to swap out a component or dive into advanced configurations, you'll likely find its structure a bit rigid.
The Modular Approach: Postfix and Dovecot
On the other hand, if you're a developer, a seasoned sysadmin, or just a hobbyist who loves to get their hands dirty, the modular path offers unparalleled power. This means you'll be manually installing and configuring each piece of open-source software. The heart of this setup is almost always Postfix (the Mail Transfer Agent, or MTA) and Dovecot (the IMAP/POP3 server).
Going this route gives you complete, granular control. You get to hand-pick every single component. Want a different webmail client? No problem. Need to integrate a highly specific anti-spam tool or fine-tune performance for a high-volume setup? This is how you do it. It’s the difference between buying a pre-built computer and building your own custom rig.
This level of control is essential in some scenarios, but be warned: it’s a serious time commitment. A manual setup demands a solid understanding of Linux, networking, and security best practices. One small misconfiguration can leave your server vulnerable or, worse, get your domain blacklisted by major email providers.
Making Your Decision
So, how do you choose? It really comes down to your priorities. To make it clearer, let's put these two approaches side-by-side.
Email Server Software Stack Comparison
The table below breaks down the key differences between the plug-and-play convenience of Mail-in-a-Box and the deep control offered by a manual setup.
| Attribute | Mail-in-a-Box | Manual Setup (Postfix/Dovecot) |
|---|---|---|
| Ease of Setup | Very High (Automated Script) | Very Low (Manual Configuration) |
| Time Investment | Low (Under an hour) | High (Days or weeks) |
| Customization | Low (Designed to be rigid) | Very High (Full control) |
| Maintenance | Medium (Automated updates) | High (Manual updates for all components) |
| Best For | Beginners, small businesses, users wanting a quick setup. | Experts, developers, users needing specific configurations. |
Ultimately, there's no single "best" answer, only the best fit for you. If your main goal is a secure, private email server with minimal fuss, you can't go wrong with Mail-in-a-Box. But if you crave total control and have the technical chops to manage it, the rewarding journey of a manual build with Postfix and Dovecot is the way to go.
Your Mail-in-a-Box Installation Walkthrough
Alright, this is where the real fun begins. You've done the prep work—you've got a solid VPS and a domain name ready to go. Now, we'll bring your private email server to life using Mail-in-a-Box.
What used to be a daunting, week-long technical nightmare is now a surprisingly straightforward, scripted process. My goal here is to walk you through it, not just telling you what to click, but explaining why each step matters.
First things first, you need to connect to your new VPS. You'll do this using SSH (Secure Shell), which opens up a command-line window to your server. Once you’re in, you’re at the controls.
From this command line, the entire private email server setup boils down to a single, elegant command. You'll copy one line of code from the Mail-in-a-Box website, paste it into your terminal, hit Enter, and watch the automated installer work its magic.
Kicking Off the Automated Setup
Once that script fires up, it's like having a senior systems administrator working at warp speed right in front of you. The script first scans your server to ensure everything is in order, then it starts pulling in and configuring all the necessary software.
And it's not just one or two pieces of software—it’s a complete, self-contained ecosystem. The installer sets up:
- Postfix and Dovecot: The powerhouse duo that actually sends, receives, and stores your mail.
- Nginx: A high-performance web server for your webmail client and admin dashboard.
- Nextcloud: A fantastic bonus that gives you file storage, plus contact and calendar syncing.
- Roundcube: A clean, modern webmail interface you can access from any browser.
The installer will pause a few times to ask for your input. These prompts are your only real job during the setup, and they're crucial for tailoring the server to your domain.
The first critical prompt will ask for your email address. This will become your main admin account (e.g., you@yourdomain.com). Make sure to use the domain you just bought. Next, it will ask for your hostname. This should be a subdomain, like box.yourdomain.com.
I've seen a lot of people trip up here. A common mistake is just entering
yourdomain.comfor the hostname. Remember, the hostname is the server's name, not just the domain. Using a subdomain likeboxor
After you provide these details, the installer gets back to its work, setting up the databases, creating the initial user, and getting the whole system ready for action. It’s an incredible time-saver.
Navigating the Configuration Prompts
As the script chugs along, it tackles one of the most important parts of any modern server: security. A huge piece of that puzzle is setting up SSL/TLS certificates through Let's Encrypt. This is what gives you the little padlock icon in your browser and encrypts the connection between your users and the server.
The script fully automates this, grabbing and installing a free certificate for you. This means every bit of traffic—both web and email—is secured from day one. In the old days, this step alone was a complex and often costly headache.
The final piece of this automated setup is DNS. This can feel abstract, but Mail-in-a-Box makes it incredibly simple. Once the installation script is finished, it will give you a URL for your new admin control panel. The first time you log in, you'll land on a "System Status Checks" page.
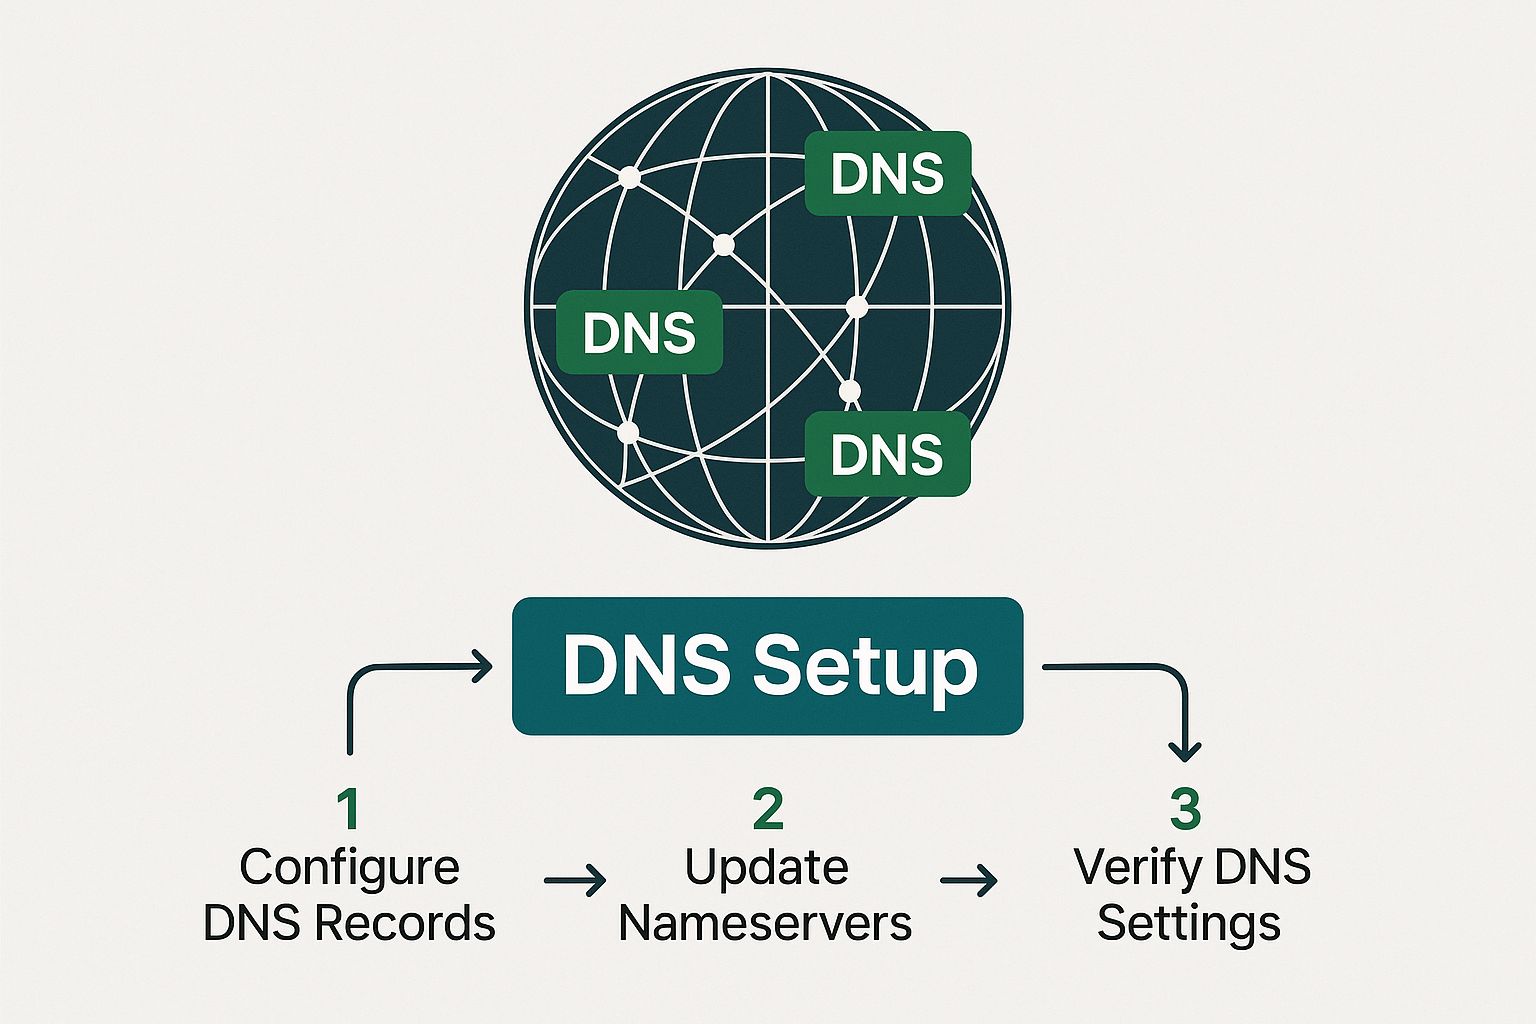
This status page is your final checklist. It literally lists every single DNS record you need to create at your domain registrar (like Namecheap or GoDaddy). It shows you the exact values to copy and paste, taking all the guesswork out of what is notoriously the trickiest part of setting up a mail server.
Once you’ve added all the DNS records, those status checks on the admin page will start turning green. That's your victory moment. It's the system's way of telling you that your server is correctly configured, visible to the world, and ready to handle email.
You've done it. Your private email server setup is complete, and you now have a fully operational, secure, and private communication platform that you truly own and control.
How to Secure and Maintain Your Email Server

Getting your server online is a huge milestone, but the job isn't done yet. A successful private email server setup is more than a one-time project; it’s an ongoing commitment. An unmanaged server can turn into a major liability surprisingly fast, so building good operational habits from day one is the key to long-term success.
The good news is that Mail-in-a-Box handles a lot of the heavy lifting right out of the box. It comes with a pre-configured firewall (ufw, or Uncomplicated Firewall) that immediately locks down all non-essential ports. Think of it as a digital bouncer for your server—it only lets approved traffic, like web and email, get through the door. This is your first and most critical line of defense.
Mastering Automated Security and Updates
While Mail-in-a-Box is designed with security in mind, you still have a part to play. The software includes an automated update script, and you need to get in the habit of running it. This script does more than just update Mail-in-a-Box; it also pulls in the latest security patches for all the underlying system packages.
I make it a point to SSH into my server and run this update at least once a week. It’s a simple two-minute task that can save you from a world of hurt by closing newly discovered vulnerabilities. Honestly, forgetting to run updates is one of the easiest ways to put your server and your data at risk.
One of the biggest wins with a solution like Mail-in-a-Box is its built-in security intelligence. It automatically configures strong TLS/SSL policies and other best practices that would take an expert hours, if not days, to implement from scratch. Trust the defaults—they’re solid for a reason.
For a deeper dive into hardening your system, our secure email server guide is a great resource for building truly bulletproof email systems. Security isn't a "set it and forget it" task; it's a continuous process of vigilance.
Implementing a Reliable Backup Strategy
Your data is, without a doubt, the most valuable thing on your server. A single hardware failure or a clumsy configuration mistake could wipe it all out in an instant. This is why you absolutely must configure the built-in backup solution in Mail-in-a-Box. It uses a great little tool called duplicity to create encrypted, incremental backups of all your mail data and system configurations.
The crucial part is sending these backups off-site. Storing backups on the same server you're protecting is useless if the entire machine goes down.
Here are a few solid options I've used for off-site backup storage:
- Amazon S3: A classic choice. It's incredibly durable and usually very cost-effective for this kind of data.
- Backblaze B2: I'm a big fan of their simple pricing and easy-to-use tools. It’s a strong contender.
- A separate VPS: For the ultimate in privacy, you can spin up another cheap VPS and use SSH as your backup destination.
Setting this up from the admin panel is incredibly straightforward. Once you’ve configured it, backups will run automatically every night. You’ll sleep a lot better knowing your data is safe and sound somewhere else.
Ongoing Maintenance and User Management
Beyond patches and backups, day-to-day maintenance involves keeping an eye on your server's health and managing your users. The Mail-in-a-Box admin panel is your command center for all of this. It has a "System Status Checks" page that constantly monitors your server's configuration. If anything is wrong—like an expiring certificate or a DNS problem—it will scream at you in red. Make a habit of checking this page.
Adding or removing users is also handled right from the web interface. You can create new email accounts, set up handy aliases (like forwarding info@yourdomain.com to your personal inbox), and manage user settings with just a few clicks. It's this simplicity that makes it perfect for small teams or organizations.
This ease of use is a major reason why Small and Medium Enterprises (SMEs) are flocking to VPS hosting for email. It’s a smart move that cuts infrastructure costs while keeping them in full control of their IT. For many startups, especially in retail where customer communication has to be secure, a private server on a VPS is a much more practical and affordable path than buying and managing physical hardware.
Common Questions About Private Email Servers
Taking the plunge into setting up your own email server is exciting, but it's natural to have a few nagging questions. It’s a big step, and you’re taking on a lot of responsibility for your own communications. Over the years, I've seen the same concerns pop up time and again, so let's tackle them head-on.
Getting these answers straight will save you headaches down the road and give you a realistic picture of what running your own mail server actually involves.
Will My Emails Go to Spam?
This is the big one, isn't it? The honest answer is: maybe, at first. A brand-new server with a fresh IP address is an unknown quantity. Major providers like Gmail and Outlook are inherently wary of them until you prove you're one of the good guys.
Your primary job is to build a solid sender reputation. This starts with proper authentication. The DNS records that Mail-in-a-Box sets up for you are non-negotiable. You absolutely must get these right:
- SPF (Sender Policy Framework): Your public whitelist of servers authorized to send email for your domain.
- DKIM (DomainKeys Identified Mail): A digital signature that proves your emails are legitimate and haven't been altered in transit.
- DMARC (Domain-based Message Authentication, Reporting & Conformance): Your policy that tells other servers how to handle mail that fails SPF or DKIM checks.
Once those are in place, you need to "warm up" your IP. Don't blast out a company-wide newsletter on day one. Start small by emailing friends and family who you know will open and reply to your messages. This back-and-forth signals to the big providers that you're a legitimate sender, not a spammer.
How Much Technical Skill Do I Really Need?
Thanks to tools like Mail-in-a-Box, the bar is much lower than it used to be. You don't have to be a Linux guru, but you can't be a complete novice either. If you're comfortable buying a domain, signing up for a VPS, and using an SSH client to log in and paste a command, you've got this.
The script does all the heavy lifting, wrestling with the intricate configurations of all the different software components. Going the manual route with Postfix and Dovecot, on the other hand, is a whole different ballgame. That path demands a serious understanding of Linux administration, network security, and the nitty-gritty of mail protocols.
Think of Mail-in-a-Box as a high-quality model kit. The instructions are clear, and a lot of the complex assembly is automated. The manual approach is like being handed a box of raw metal and a blueprint—infinitely more flexible, but it assumes you already know how to build an engine from scratch.
What Are the Ongoing Costs?
This is one of the best parts—the financial side is surprisingly lean. Your main recurring costs are just for the VPS hosting and your annual domain name renewal. A decent VPS that can handle email for a small team or a family will typically run you somewhere between $5 and $20 per month.
Domain names usually cost around $10 to $20 per year. All the critical software—Mail-in-a-Box and all its components—is free and open-source. So, you're really just paying for the digital real estate.
A huge advantage here is scalability. Unlike services that charge per seat, you can add ten, twenty, or even more email accounts for your family or team without your core costs going up. The only real constraint is your server's CPU and RAM.
Can I Migrate My Existing Emails?
Absolutely. The process is much less painful than most people imagine. The easiest way is to use a desktop email client like Thunderbird or Apple Mail. Just add both your old account (e.g., your Gmail account) and your new private server account to the client.
With both accounts visible, you can literally just drag and drop emails or entire folders from the old account over to the new one. The client uses the IMAP protocol to copy everything across. If you have a massive archive, this might take a while, so make sure you're on a stable internet connection.
Of course, things can sometimes go wrong. In case of accidental deletion during a move, it pays to be prepared. We've put together a guide that details how to recover lost emails, which can be a real lifesaver. For those who want more power, a command-line tool called imapsync can perform migrations directly between servers.
Ready to take full control of your inbox without the technical overhead of managing a server yourself? Typewire offers secure, private email hosting that puts you in the driver's seat. Enjoy the benefits of a private server—no ads, no tracking, and total data ownership—with the simplicity of a managed service.
Your Guide to Private Email Server Setup
Posted: 2025-08-04
What Is DMARC? Simplify Email Security
Posted: 2026-06-19
Email Blacklist Check: Restore Your Deliverability
Posted: 2026-06-17
Typewire Increases Storage for Pricing Plans: More Space
Posted: 2026-06-13
How to Get a .ca (Canadian) Email Address
Posted: 2026-06-12
Canadian Business Email: Best Options and How to Set It Up
Posted: 2026-06-09
PIPEDA Compliance: What Canadian Businesses Need to Know
Posted: 2026-06-05
What Is CASL? Canada’s Anti-Spam Law, Explained
Posted: 2026-06-02
What Is Whaling? How Executive Email Fraud Works
Posted: 2026-05-29