How to Host an Email Server: A Guide to Privacy and Security

Deciding to host an email server is a major step toward digital independence. It's about taking full control of your communications, moving away from big tech platforms, and creating a private, secure hub for your most sensitive correspondence. While this path offers unparalleled email privacy and security, it demands significant technical commitment.
Why Bother Hosting Your Own Email?

Let's be honest. When hosted email platforms from Google and Microsoft are polished, feature-rich, and seemingly free, the idea of running your own email server can seem counterintuitive. Why take on the complexity? The answer centers on a single, powerful concept: digital sovereignty.
When you use a free email platform, you are the product. Your data resides on their servers, governed by their terms of service. It’s well-documented that your emails may be scanned for ad targeting, data mining, or to comply with broad government surveillance requests. For individuals and businesses who prioritize confidentiality, this is a significant privacy risk.
The Real Reasons for Self-Hosting: Privacy and Security
The choice to run your own email server typically stems from critical needs for data control and protection. For businesses in regulated industries like healthcare or finance, data residency—ensuring data stays within a specific country—is often a legal requirement. Self-hosting provides a direct way to enforce this.
Beyond compliance, the core drivers are:
- Total Privacy: When you run the server, you eliminate third-party data scanning. Your emails remain confidential, free from algorithms building a profile on you or your business.
- Enhanced Security: You control the entire security stack. From encryption protocols to access controls and threat monitoring, you can implement a defense tailored to your specific security posture.
- Full Control: You escape the whims of large providers who can change policies, suspend your account, or discontinue features you depend on. You set all the rules, from mailbox sizes to security policies.
Choosing to self-host is fundamentally a decision to treat your email as a private asset rather than a commodity. It’s about building a digital fortress where you are the sole gatekeeper.
Self-Hosted vs Hosted Email Platforms: A Quick Comparison
To put it into perspective, here's a quick look at how running your own server stacks up against using a hosted email platform like Gmail or Outlook.
| Feature | Self-Hosted Email Server | Hosted Email Platform (e.g., Gmail, Outlook) |
|---|---|---|
| Control | Complete control over software, security policies, and data. | Limited to provider's settings and features. |
| Privacy | Maximum privacy; no third-party data scanning for ads. | Lower privacy; data is often scanned for profiling and ads. |
| Cost | Higher upfront/ongoing costs (hardware, software, time). | Low or free for basic tiers; predictable subscription fees. |
| Maintenance | Your full responsibility (updates, security, backups). | Handled by the provider; minimal user effort. |
| Scalability | Complex; requires manual hardware/software upgrades. | Easy; upgrade your plan with a few clicks. |
| Deliverability | Your responsibility; requires careful configuration. | Generally high due to established reputation. |
This table makes it clear: the choice is between total control and total convenience.
When Self-Hosting Makes Strategic Sense
Running your own mail server isn't just about principles; it has practical advantages. For a developer, a self-hosted server is the perfect sandbox for testing applications that send emails, free from the rate limits and quirks of external services. For a privacy advocate, it's a way to opt out of mass data collection entirely. If you're weighing where your IT infrastructure should live, understanding the differences between cloud and on-premise solutions can provide valuable context.
In the end, hosting your own email server is a conscious choice to prioritize autonomy. If you’re willing to take on the technical challenges, the control and privacy you gain are things no free platform can ever offer.
Choosing Your Foundation: Server Hardware and Network Essentials

Before you install a single piece of software, the entire success of your email server hinges on the foundation you build. This isn't just about raw horsepower; it's about making smart choices that align with your goals for reliability, performance, and security. Get these core elements right from the start, and you'll save yourself countless headaches down the road.
The first major decision is where your server will live, whether that's a physical machine in a data center or a virtual slice of one. Each option strikes a different balance between cost, control, and complexity.
Selecting Your Hosting Environment
Your choice of hosting will directly impact your server's performance, how it scales, and just how much hands-on management you'll be doing. When you decide to host an email server, you're generally looking at three main paths.
- Dedicated Server: This is your very own physical machine rented from a hosting provider. You get exclusive access to all the resources—CPU, RAM, and storage—so nobody else’s traffic can slow you down. It’s the top-tier option for performance and control, but it also comes with the highest price tag.
- Virtual Private Server (VPS): A VPS is easily the most popular and budget-friendly choice. It’s a virtual machine on a shared physical server, but with its own guaranteed slice of resources. While you share the underlying hardware, any good VPS provider ensures your performance is consistent and walled off from other users.
- Home Lab or On-Premises: Running a server from your home or office gives you the ultimate physical control and privacy. That said, this path is riddled with challenges. You have to deal with residential internet limitations (like blocked ports), guarantee power and network uptime, and physically secure the machine. It’s a fantastic learning experience, but I wouldn't recommend it for any business-critical email.
For most folks just starting out, a VPS from a reputable provider hits the sweet spot, balancing cost, performance, and the necessary network infrastructure.
Sizing Your Server Resources
Once you've picked an environment, you need to give it enough juice to run properly. Skimping on resources is a classic mistake that leads to sluggish performance and failed deliveries, while over-provisioning just burns cash.
Your needs will scale directly with your number of users and email volume. As a solid starting point for a personal or small business server (around 1-10 active users), I’d recommend:
- CPU: At least 2 vCPUs. This gives you enough power to handle email processing, spam filtering, and other background tasks without hitting a bottleneck.
- RAM: A bare minimum of 2 GB of RAM is crucial. Email servers, especially when you add anti-spam and anti-virus scanners, are memory hogs. Anything less, and you'll feel the slowdown.
- Storage: Start with at least 25-50 GB of SSD storage. The speed of an SSD is a game-changer for quick mailbox access and processing compared to old-school spinning hard drives.
Remember, these are starting points. It's way easier to upgrade a VPS plan than it is to migrate everything to a new server later on. It’s always wise to err on the side of slightly more resources than you think you need.
Unpacking Critical Network Requirements
Hardware is only half the story; your server's network setup is just as vital. Without the right configuration, your emails will almost certainly be flagged as spam or rejected outright.
There are two network elements that are absolutely non-negotiable for anyone looking to host an email server successfully.
- A Static Public IP Address: Your server's IP address is its identity on the internet. It absolutely must be static, meaning it never changes. Dynamic IPs, which are common with home internet plans, are a major red flag for other mail servers and often land on blocklists by default.
- Reverse DNS (PTR Record): A standard DNS record (the 'A' record) points your domain name to your IP address. A PTR record does the opposite—it maps your IP address back to your domain name. This is a fundamental check used by receiving mail servers to verify a sender's identity. Many will flat-out reject mail from any IP that doesn't have a valid PTR record.
Thankfully, these network essentials come standard with most business-grade internet connections and virtually all VPS or dedicated server providers. Trying to work around them is a recipe for deliverability failure.
Building the Core: The Mail Transfer Agent Setup
With your server foundation ready, it's time to bring your email system to life. This is where we install and wire up the core components that actually handle sending, receiving, and storing mail. Think of this as dropping the engine and transmission into your email vehicle.
The most critical piece of this puzzle is the Mail Transfer Agent (MTA). It’s the mail carrier of the internet, doing all the heavy lifting of routing messages between servers. For this job, Postfix is the undisputed champion. Its strong security record, rock-solid performance, and incredible documentation make it the go-to choice for professionals.
Installing and Configuring Postfix
Getting Postfix installed is usually a simple one-liner on most Linux distributions. The real craft, however, lies in its configuration file, main.cf. This file is the brain of your mail server, and a few key directives will make or break your setup.
Instead of just blindly copying and pasting settings, let’s get into the why behind the crucial parameters. These are the details that separate a server that just works from one that’s secure, efficient, and respects privacy.
myhostname: This needs to be your server's fully qualified domain name (FQDN), likemail.yourdomain.com. It's your server's public identity.mydestination: This tells Postfix which domains it should handle mail for locally. If you're hostingyourdomain.com, you'll list it here.mynetworks: This is a critical security setting. It defines trusted IP addresses that can relay mail through your server without extra checks. You absolutely want to lock this down to just the server itself (127.0.0.0/8) to prevent spammers from turning your server into their personal spam cannon.
The name of the game is configuring your MTA with the principle of least privilege. Only grant permissions that are absolutely necessary. An overly permissive setup is a massive security risk when you host an email server.
A huge part of getting mail to your server is a correctly configured MX record. For a deep dive on how this works, check out a practical guide to MX record lookup. Understanding these core pieces helps build a bigger picture; you can learn more in our guide on what a mail server is and its role in privacy and security.
Securing Transmissions with TLS Encryption
Sending email in plaintext is a relic of the past. Encrypting the connection between email clients and your server—and between your server and other mail servers—is non-negotiable. This is where Transport Layer Security (TLS) comes in.
Thankfully, getting TLS certificates is now free and completely automated, thanks to Let's Encrypt. By installing their certbot client, you can issue a certificate for your mail server's domain in minutes.
Once you have your certificate files, you just need to tell Postfix where they are in main.cf:
smtpd_tls_cert_file: Path to your public certificate file (the.pemor.crt).smtpd_tls_key_file: Path to the corresponding private key file.smtpd_use_tls = yes: This flips the switch, enabling TLS for all incoming connections.
With TLS enabled, login credentials and the entire content of emails are encrypted and shielded from prying eyes as they move across the internet.
Introducing the Mail Delivery Agent: Dovecot
While Postfix is the expert at routing mail, it doesn't actually give users a way to access their mailboxes. That's the job of a Mail Delivery Agent (MDA).
For this, we turn to Dovecot, the industry standard for IMAP/POP3 servers. It’s renowned for its speed, robust security features, and straightforward configuration.
Dovecot and Postfix work as a team. When Postfix receives an email for a local user, it hands it off to Dovecot, which then carefully places it into the correct user's mailbox, typically in a format like Maildir.
Getting Dovecot up and running involves a few key moves:
- Defining Mailbox Location: You have to tell Dovecot where user emails are stored, and this location must match what Postfix expects.
- Enabling Protocols: You'll want to enable IMAP (and maybe POP3, though IMAP is far better for modern devices) so clients like Outlook or Apple Mail can connect.
- Configuring Authentication: Dovecot needs a way to verify users. It can check against local system users or a separate virtual user database, giving you plenty of flexibility.
And just like with Postfix, you'll point Dovecot to the very same Let's Encrypt TLS certificate. This ensures the entire session, from logging in to reading and sending mail, is fully encrypted. This Postfix and Dovecot combination forms the powerful, secure heart of your self-hosted email platform.
Ensuring Your Emails Actually Reach the Inbox
Sending an email is the easy part. Getting it to land in someone's inbox? That’s a whole different ballgame. When you decide to host an email server, you're starting with a clean slate—which means you have zero reputation. Your job is to build that reputation from the ground up using a specific set of DNS records that prove your server is legit.
Think of these records like your server's passport. When your email arrives at a major inbox provider like Gmail or Outlook, their systems act like border control, checking your credentials. If anything looks off or is missing, your email gets flagged, delayed, or sent straight to the junk folder.
Getting these DNS settings right isn't just a recommendation; it's the most critical part of achieving good deliverability.
The Foundational Trio: SPF, DKIM, and DMARC
These three records are the absolute bedrock of modern email authentication. They work as a team to prove that an email claiming to be from your domain was actually sent by a server you’ve authorized. This is your first and best defense against spammers trying to impersonate (or "spoof") your domain.
Let's quickly break down what each one does.
- Sender Policy Framework (SPF): This is the most straightforward of the three. It’s a simple TXT record in your DNS that lists all the IP addresses allowed to send email for your domain. When a server receives an email from you, it looks at the sender's IP and checks it against your list. Match? Great, it passes.
- DomainKeys Identified Mail (DKIM): DKIM brings cryptography into the mix. It attaches a unique digital signature to every email you send, created with a private key that only your server knows. The public key is published in your DNS for everyone to see. Receiving servers use that public key to verify the signature, proving the email hasn't been altered in transit.
- Domain-based Message Authentication, Reporting, and Conformance (DMARC): DMARC is the enforcer. It ties SPF and DKIM together by telling other servers what to do if an email fails either check. You set the policy: do nothing (
p=none), send it to spam (p=quarantine), or reject it outright (p=reject). DMARC also gives you invaluable reports on who is sending mail from your domain, helping you spot abuse early.
Setting these up is non-negotiable. Without them, your emails will be treated with heavy suspicion. For a detailed walkthrough, check out our real-world email authentication setup guide that works.
The Unsung Hero of Deliverability: The PTR Record
While SPF, DKIM, and DMARC are all about your domain, the PTR record (or pointer record) is all about your server's IP address. It does one simple but vital job: it maps your IP address back to your server's hostname (e.g., mail.yourdomain.com). This is often called a "reverse DNS lookup."
This is a fundamental trust signal. Spammers often send from hacked machines or temporary servers that don't have a valid PTR record. As a result, a massive number of mail servers will flat-out reject any email from an IP that fails a reverse DNS check.
Your PTR record must match the hostname your server uses to identify itself. A mismatch is a classic rookie mistake that leads to widespread email rejection. You'll typically set this up through your VPS or dedicated server provider's control panel.
Warming Up Your IP Address: You Can't Skip This
Your brand-new server comes with a brand-new IP address that has zero sending history. To providers like Google and Microsoft, this is a huge red flag. If you suddenly start blasting out hundreds of emails, their algorithms will almost certainly flag you as a spammer and block you.
This is where "warming up" your IP comes in. It's the process of slowly and methodically building a positive sending reputation over several weeks.
Here’s a practical game plan:
- Start Small: For the first week, send just a few emails a day to accounts you own on major platforms like Gmail, Outlook, and Yahoo.
- Engage With Them: Don't just send and forget. Open those emails, click the links, and maybe even reply. This shows the inbox providers that a real human wants this mail.
- Slowly Increase Volume: Week by week, gradually increase the number of emails you send. Keep an eye on your server logs and use tools like MXToolbox to make sure you haven't been blacklisted.
- Send Your Best Stuff First: During the warmup, prioritize high-engagement emails like password resets or purchase receipts before you even think about sending out newsletters.
With an estimated 333 billion emails sent daily in 2022—a figure expected to reach 376 billion by 2025—inbox providers have to rely on reputation to filter the noise. This makes a careful IP warmup mandatory for anyone who wants to host an email server successfully. Discover more email marketing statistics that highlight why this matters. Be patient here. Rushing the warmup will only cause long-term deliverability headaches.
Fortifying Your Server Against Threats
Let’s be blunt: the moment you put an email server online, it becomes a target. Automated scanners, bots, and attackers will start probing it for weaknesses almost immediately. When you decide to host an email server, you're not just setting up mailboxes—you're stepping into the role of a digital security guard for a high-value asset. This isn't about just having a strong password; it's about building a multi-layered defense.
Each layer you add, from filtering incoming junk to automatically blocking bad actors, makes your server a much harder target. It's the difference between leaving your front door wide open and securing it with a deadbolt, an alarm system, and a guard dog.
Building Your First Line of Defense: Anti-Spam and Anti-Virus
The overwhelming majority of threats will try to walk right through the front door disguised as a legitimate email. We're talking about phishing scams, attachments loaded with malware, and a relentless flood of spam. These aren't just annoyances; they're direct attacks. Your first job is to stop them cold.
For years, two open-source projects have been the workhorses for this task, and for good reason:
- SpamAssassin: Think of this as a seasoned detective for your email. It uses a clever technique called heuristic analysis, examining every incoming message against thousands of rules. It checks for tell-tale signs of spam—suspicious headers, a sender with a bad reputation, a history of spammy phrases—and assigns a "spam score." You set the threshold, and anything that scores too high gets rejected or tossed into a quarantine folder.
- ClamAV: This is your dedicated virus scanner. It plugs right into your mail server pipeline to scan attachments for known viruses, trojans, and other nasty surprises before they can ever land in a user's inbox. With its constantly updated virus database, it's essential for catching the latest threats.
Integrating these two tools is a non-negotiable first step. It transforms your server from a passive target into an active defender, filtering out a massive percentage of malicious traffic right at the gate.
This diagram shows how email authentication protocols like SPF, DKIM, and DMARC work together to validate incoming mail and protect your server's reputation.
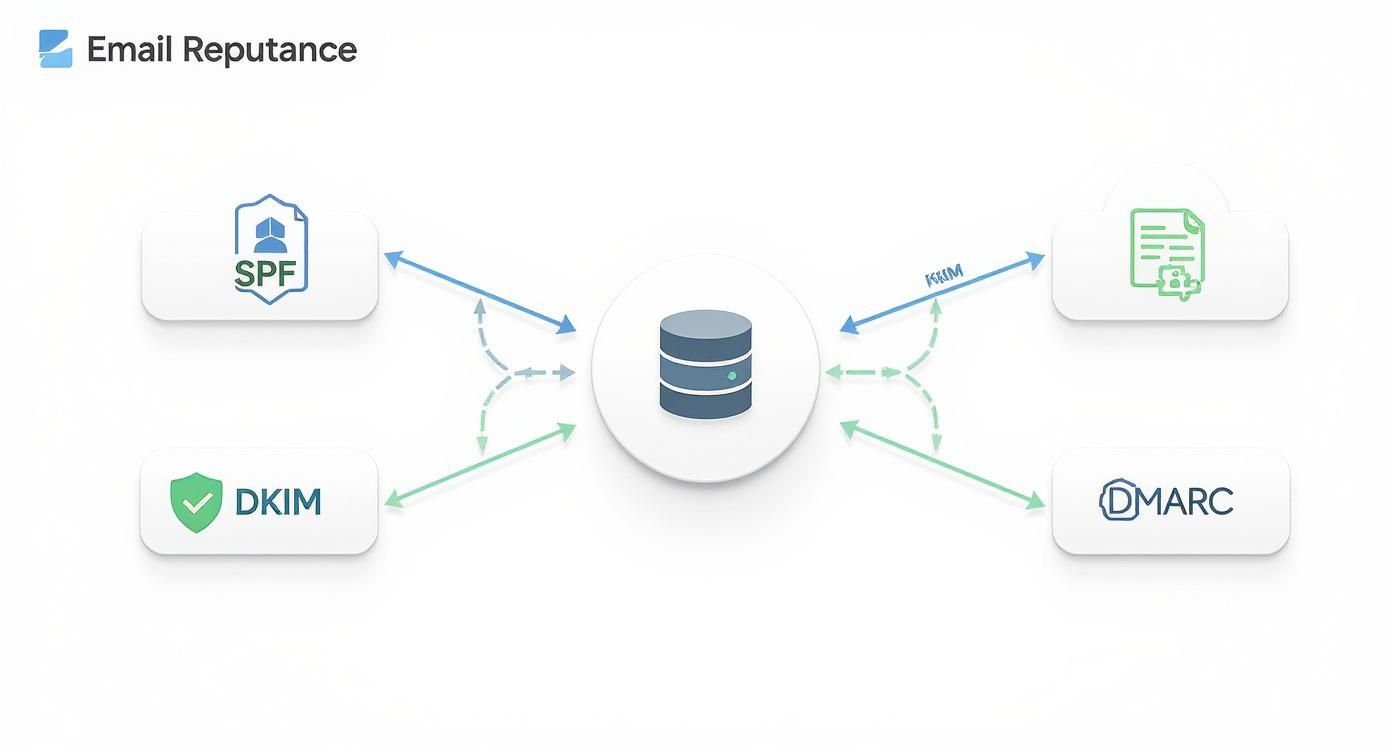
As you can see, a strong sender reputation isn't built on a single solution. It's the result of several interconnected security protocols all working in concert.
Practicing Essential Server Hygiene
Beyond filtering the content, you have to harden the server itself. The goal here is to shrink your "attack surface"—basically, to lock down as many potential entry points as possible.
Start with a well-configured firewall. This is absolutely critical. Your default policy should be "deny all," meaning every network port is closed unless you have a specific, essential reason to open it. For a mail server, that typically just means the ports for SMTP, IMAP, and your secure remote access (SSH). Anything else is an unnecessary risk.
Next, you need to automate your defense against brute-force password guessing. This is where a tool like fail2ban is invaluable. It actively watches your server logs for patterns of failed login attempts. If it sees the same IP address trying to guess passwords over and over, it automatically adds a rule to your firewall to block that IP for a while. It's simple, effective, and works 24/7.
To keep your server secure, you need a proactive mindset. This table outlines the critical security layers you should implement and maintain.
Essential Security Checklist for Your Email Server
| Security Layer | Action Item | Primary Goal |
|---|---|---|
| Network Perimeter | Configure a strict "deny by default" firewall. | Block all unauthorized access and shrink the attack surface. |
| Content Filtering | Install and configure SpamAssassin and ClamAV. | Stop spam, phishing, and malware before they reach user inboxes. |
| Authentication | Enforce strong, complex passwords for all accounts. | Prevent unauthorized account access via password guessing. |
| Brute-Force Protection | Deploy fail2ban to monitor SSH and mail service logs. |
Automatically block IPs attempting to brute-force logins. |
| System Integrity | Keep all OS and mail server software updated regularly. | Patch known vulnerabilities before they can be exploited. |
| Data Recovery | Implement and test a 3-2-1 automated backup strategy. | Ensure you can recover quickly from hardware failure or compromise. |
This checklist isn't just a one-time setup; it's a routine. Regularly reviewing these items is part of the ongoing responsibility of running a secure email server.
Security isn't a project you finish; it's a process you maintain. Regular software updates, reviewing logs, and staying aware of new threats are all part of the job when you run your own email.
The push for self-managed infrastructure is real. In fact, server spending saw a massive 97.3% year-over-year increase in the second quarter of 2025, showing how seriously businesses are taking control of their own data. With over 4.6 billion daily email users worldwide, the demand for secure and reliable servers is higher than ever. You can discover more insights on server spending trends to see where the market is headed.
Creating a Bulletproof Backup Strategy
No matter how many layers of defense you build, you have to plan for the worst. Hardware can fail, a configuration mistake can bring everything down, or a sophisticated attack could succeed. Your ability to bounce back from a disaster hinges entirely on your backups. They are your ultimate safety net.
A solid backup plan needs to cover two things:
- Mail Data: Every mailbox, every folder, every message. Losing this is simply not an option.
- Server Configurations: All the detailed config files for Postfix, Dovecot, SpamAssassin, your firewall, and everything else. Trying to rebuild this from memory during a crisis is a nightmare you want to avoid.
The gold standard here is the 3-2-1 rule: keep three separate copies of your data, on two different types of media, with at least one copy stored off-site. For a self-hosted server, a practical approach is to set up automated daily backups to a separate hard drive on the server itself, while also pushing an encrypted copy to a remote location, like a cloud storage provider or another physical server. This way, even if your entire server is destroyed or compromised, you have a clean, safe copy ready for restoration.
Common Questions About Self-Hosting Email
After walking through the nitty-gritty of running your own email server, you probably have a few big-picture questions bouncing around. That's completely normal. Deciding to host an email server is a serious commitment, so let's tackle some of the most common concerns head-on.
Is It Cheaper to Host Your Own Email Server?
On the surface, grabbing some open-source software and using hardware you already have seems like a surefire way to save money. But that perspective rarely accounts for the hidden costs that creep in. The biggest one? Your time. We're talking countless hours spent on the initial setup, late-night troubleshooting sessions, and the constant, ongoing maintenance.
Beyond the time sink, you'll have recurring hard costs for things like a reliable VPS and a static IP address. And don't forget the financial risk of downtime—every hour your server is offline could mean lost business or a missed critical message. For just one person, the time investment alone usually makes a good managed plan a much better deal. For a small business, self-hosting can be more cost-effective as you scale, but only if you already have someone on staff who truly knows what they're doing.
What Are the Biggest Challenges of Self-Hosting Email?
If you decide to go it alone, get ready to juggle three major challenges that never really go away: security, deliverability, and maintenance.
- Security is a constant battle. You're the one on the front lines, responsible for fending off an endless stream of spam, phishing attacks, and direct assaults on your server.
- Deliverability is a delicate art. Getting your emails to actually land in someone's inbox at Google or Microsoft requires perfect DNS records (SPF, DKIM, DMARC) and a squeaky-clean IP reputation. One mistake can get you blacklisted fast.
- Maintenance is a forever job. You'll be applying security patches, updating software, poring over logs to spot trouble, and double-checking that your backups are actually working.
Drop the ball on any one of these, and you could end up with a compromised server, unreliable email, or a system that just stops working entirely.
A managed private email host is the ideal solution when you demand the privacy and control of a self-hosted server but lack the time or deep technical expertise to manage one yourself.
When Is a Managed Private Email Host a Better Option?
A managed private email host is the clear winner when your main goal is reclaiming your data privacy and control, not taking on a new sysadmin hobby. It’s the perfect fit for small businesses, professionals, and individuals who care deeply about data sovereignty but can't afford or justify a full-time IT expert.
With a managed service, you get your own private server, but someone else handles all the messy, complicated stuff—the initial setup, the constant security updates, the deliverability tuning, and all the routine maintenance. It gives you the secure, private email you're after without the massive headache. If you're trying to get away from Big Tech's prying eyes, this is your most direct path.
If you want the benefits of a private server—total privacy, robust security, and full control—without the technical burden, Typewire is the answer. We manage the infrastructure so you can focus on what matters. Start your 7-day free trial and experience secure, ad-free email today at https://typewire.com.
How to Host an Email Server: A Guide to Privacy and Security
Posted: 2025-12-08
What Is DMARC? Simplify Email Security
Posted: 2026-06-19
Email Blacklist Check: Restore Your Deliverability
Posted: 2026-06-17
Typewire Increases Storage for Pricing Plans: More Space
Posted: 2026-06-13
How to Get a .ca (Canadian) Email Address
Posted: 2026-06-12
Canadian Business Email: Best Options and How to Set It Up
Posted: 2026-06-09
PIPEDA Compliance: What Canadian Businesses Need to Know
Posted: 2026-06-05
What Is CASL? Canada’s Anti-Spam Law, Explained
Posted: 2026-06-02
What Is Whaling? How Executive Email Fraud Works
Posted: 2026-05-29